
In previous posts, we have looked at how to use portable PostgreSQL on Windows without installing it. However, one of the advantages of the installation is that it sets up additional things like Windows service. In this post, we show how to register and run the portable installation as a Windows service.
Why would you want to do this? Using different portable installations is a great way to try PostgreSQL and to use it occasionally rather than all the time. However, every now and then, you might want to get into focussed activity and stopping and starting the database might get in the way. Occasionally setting it up as a service might remove some of the friction. I tend to do this occasionally and leave it there for a few days so that the database is always available… and then, when I’m done, I unregister it from being a service, so it’s not running any more.
To register and remove the service, the main command we use is still bin/pg_ctl.exe from the version that you want to use. Note that this command needs to be run as an Administrator. For all the steps below, start Command Shell as an Administrator and execute the commands below.
This post assumes that your portable setup on Windows was done using the earlier post on this site for setting up PostgreSQL 18 without installation. Please read that first to understand how things are set up.
Registering and Using the Service
We use pg_ctl.exe to register the PostgreSQL server as a Windows service. The simplest way is to do this:
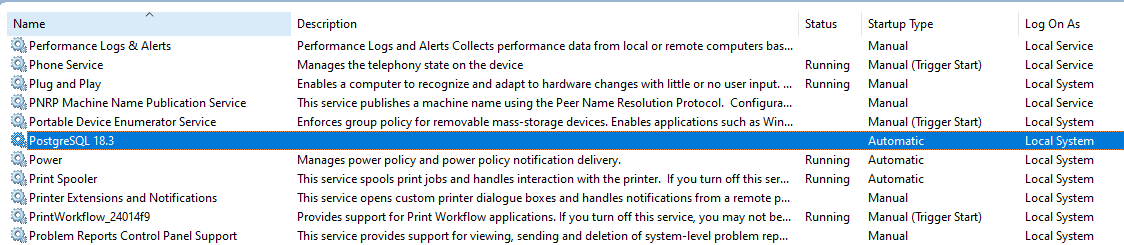
$ pg-18.3\bin\pg_ctl.exe register -N "PostgreSQL 18.3" -D pg-18.3\dataThe command will install the PostgreSQL server as a Windows service named PostgreSQL 18.3 – start up the Services Manager ($ services.msc) and you’ll see the service listed there. You’ll notice that the startup type is Automatic which means that it will automatically start when the computer restarts but it’s not running yet.
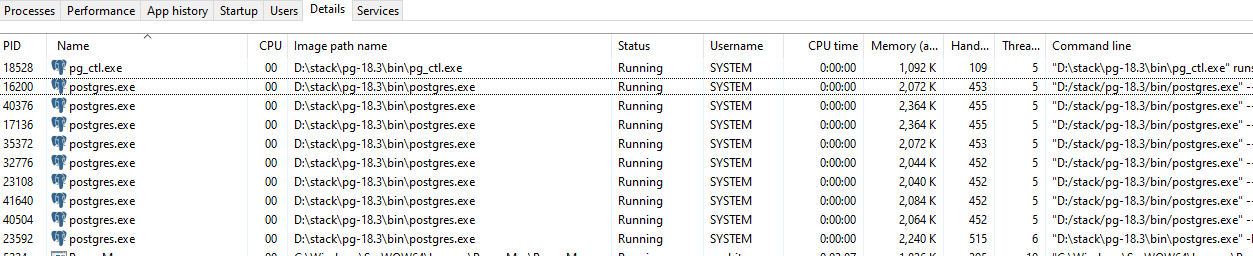
You can click on the service and right click Start and then you’ll see it listed in the Task Manager.
Unregistering and Removing the Service
To remove the service, stop it from the Windows Services Manager, and then execute this on a command line (with Administrator permissions):
$ pg-18.3\bin\pg_ctl.exe unregister -N "PostgreSQL 18.3"Note that the text after the -N needs to exactly match the service name you provided when you registered it.
Configuring the Service/ Server Port
When we ran the server directly from our portable setup, we set up a few variables. These were set up in the environment when we run. We don’t need to worry about the PATH and PGDIR since we are pointing to the correct pg_ctl.exe and we also passed the PGDATA path when we set it up. We did not, however, pass the PGPORT, so we can do that by including -o "-p %PGPORT%" when we register the service:
$ pg-18.3\bin\pg_ctl.exe register -N "PostgreSQL 18.3" -D "%PGDATA%" -o "-p %PGPORT%"Handling Logs
We previously set the logs to be sent to a specific log file. However, the service automatically sends logs to Windows and these can be viewed using the Windows Event Viewer. This may be a better option for centralising logs and using it in that kind of setup. However, if you want to still send logs to a logfile, the easiest way is to have a configuration file that specifies this.
In the setup you have done, you will find postgresql.conf in the data folder. Stop the service first, then let’s open it and edit it. Search for logging to jump to the correct section.
These are the settings we want to edit:
#log_destination = 'stderr'		# Valid values are combinations of
					# stderr, csvlog, jsonlog, syslog, and
					# eventlog, depending on platform.
					# csvlog and jsonlog require
					# logging_collector to be on.

# This is used when logging to stderr:
#logging_collector = off		# Enable capturing of stderr, jsonlog,
					# and csvlog into log files. Required
					# to be on for csvlogs and jsonlogs.
					# (change requires restart)

# These are only used if logging_collector is on:
#log_directory = 'log'			# directory where log files are written,
					# can be absolute or relative to PGDATA
#log_filename = 'postgresql-%Y-%m-%d_%H%M%S.log'	# log file name pattern,
							# can include strftime() escapes
Let’s change these to:
log_destination = 'stderr'
logging_collector = on
log_directory = 'd:/stack/logs/pg-18.3'
log_filename = 'postgresql-%Y-%m-%d_%H%M%S.log'
Note that we chose their recommended name for the logfile that is a bit more dynamic than just logfile alone. Now, if you start the service again, logs will go to the logfile instead of Event Viewer. Also, if you start the server locally using the pg18-start.cmd that we previously added, the Environment Variable is used in the command to start the server:
"%PGDIR%\bin\pg_ctl" -D "%PGDATA%" -l "%PGLOGS%" startThis takes precedence over the setting in the configuration file – you can remove this (from pg18-start.cmd and pg18-stop.cmd) if you prefer to follow the new approach for the logs.
Adding Command Files for the Service Register/ Unregister
If you want, you can add command files for this (I do it only because I forget the command).
We add PG_SERVICE_NAME to the list of var.
@SET PATH=%~dp0pg-18\bin;%PATH%
@SET PGDIR=%~dp0\pg-18
@SET PGDATA=%PGDIR%\data
@SET PGLOCALEDIR=%PGDIR%\share\locale
@SET PGPORT=5418
@SET PGDATABASE=postgres
@SET PGUSER=postgres
@SET PGLOGS=%~dp0\logs\pg-18\logfile
@SET PG_SERVICE_NAME=PostgreSQL 18.3
We then create a new file for pg18-register.cmd with this in it:
@ECHO ON

:: Save the directory where we are
pushd %CD%

:: Shift directories to the correct path
%~d0
cd %~dp0

:: Set the variable using the common file
call pg18-vars.cmd

:: The actual command that needs to do something
"%PGDIR%\bin\pg_ctl" register -N "%PG_SERVICE_NAME%" -D "%PGDATA%" -o "-p %PGPORT%"

:: Restore the directory where we started from
popd
We also create a new file for pg18-unregister.cmd with this in it:
@ECHO ON

:: Save the directory where we are
pushd %CD%

:: Shift directories to the correct path
%~d0
cd %~dp0

:: Set the variable using the common file
call pg18-vars.cmd

:: The actual command that needs to do something
"%PGDIR%\bin\pg_ctl" unregister -N "%PG_SERVICE_NAME%"

:: Restore the directory where we started from
popd
Further Reading
These pages are helpful:
- The description of
pg_ctlis at the PostgreSQL docs site – it includes all the stuff that you can do with it and also has the explanations for the main parameters that we set. - There’s a lot more on PostgreSQL logs at: https://last9.io/blog/postgres-logs-101/
- Logging to file from the service is discussed on StackExchange
- As always, we save the current directory from where our scripts are called as explained in more about pushd / popd here)
- Instructions to set up PostgreSQL 18 without installation
- Instructions to set up PostgreSQL 16 without installation
- Instructions to set up PostgreSQL 12 without installation
As always, this is for me to be able to remember how to do it but if it helps someone, that’s great! Also, if you have some comments, I’d love to hear from you. Feel free to connect or share the post (you can tag me as @onghu on X or on Mastodon as @onghu@ruby.social or @onghu.com on Bluesky to discuss more).